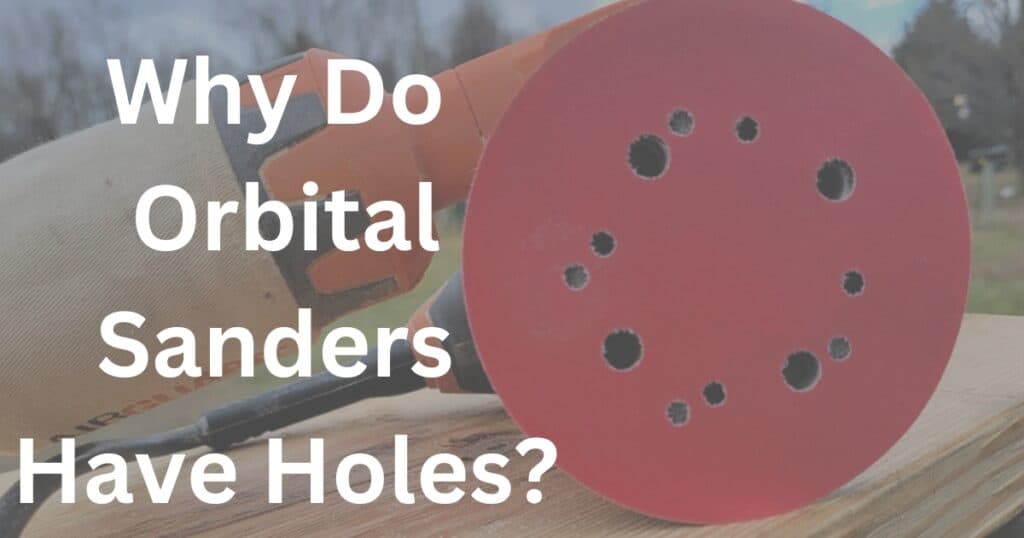
If you are new to using an orbital sander or just aren’t sure of how often you should replace your sanding disc, then you are not alone. I have used an orbital sander on multiple projects but still have never really been exactly sure of when I should replace the sandpaper.
If I replaced the sanding disc every single time I started to notice the slightest change in performance, I would be broke. That would be an insane amount of sanding discs.
On the other hand, if I never replaced the sanding disc, I would never get anywhere. I would be stuck sanding the same piece of wood all day.
So to help solve this question once and for all, I have searched the web and found the answer to how often you should actually be changing your orbital sanders sanding disc.
The sanding disc on a random orbital sander can last anywhere from 5-10 minutes of continuous sanding before needing to be changed. The disc can be used for as long as 30 minutes but will decrease in performance and significantly increase sanding times as the grit becomes wore down, and the sanding disc becomes clogged. However, cleaning the sandpaper often will increase the useful life of the sanding disc.
These times are very general and will highly depend on the quality of your sanding disc. Instead of looking at a specific time, it is better to know what signs to watch out for. Keep reading as we dive deeper into this topic.
Sanding Disc Life: What to Watch For?
Yes, you can generally expect your orbital sanders sanding disc to last about 5 – 10 minutes of continuous use, but it’s a lot more complex than that. If you are a beginner, using a time-based schedule may work, but you will want to learn how to identify a worn-out sanding disc.
There are a ton of factors that affect the expected life of the sanding disc on your orbital sander. The brand and quality of the disc, the type of wood you are sanding, the grit you are using; the list goes on and on. In this section, we will dive into some of the things to watch for so you know exactly when to change your orbital sanders sanding disc.
Too Much Pressure
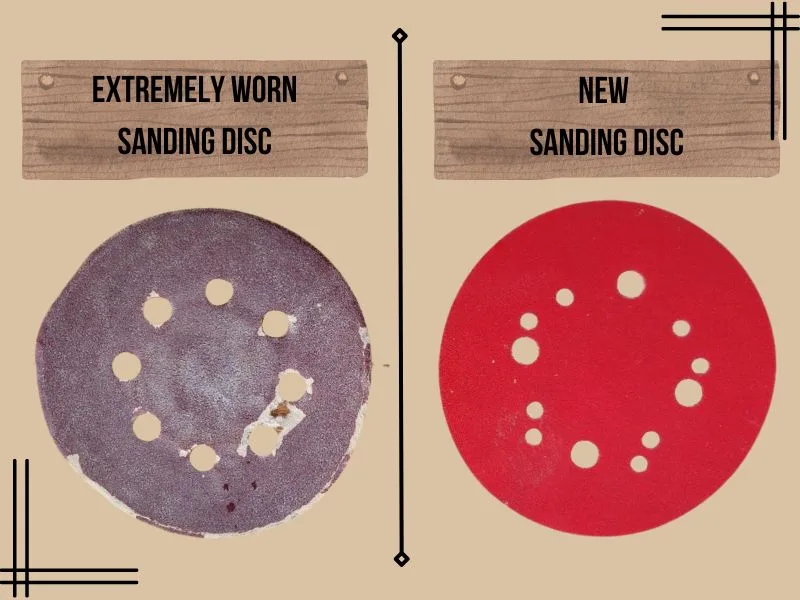
If you notice you are having to lean more into the sander or apply more pressure to get the same results, it is time to replace the sanding disc. As the sandpaper gets clogged or the grit begins to wear down, it will become less aggressive at removing material.
By applying more pressure, it will remove more material, but it increases heat and resistance inside the random orbital sanders motor and can lead to damage.
It is better to just replace the sanding disc to prevent any damage to your sander.
Taking Longer than Normal
Taking a significantly more amount of time to sand the same amount of surface area is a good indication that your sanding disc is nearing the end of its life and will need to be replaced.
The general rule is to sand at a speed of 1 inch per second. Moving slower than this to achieve the same results indicates the sanding disc should be replaced.
Unusual Scratces
Pay attention to your work surface as you are sanding and look for any unusual marks. A random orbital sander should not be leaving behind things like swirl marks.
If this starts to happen you should inspect your sanding disc to determine if it is the culprit.
Swirl marks can indicate a few different issues, but it is best to start by checking the disc. It could be that the sandpaper is just getting clogged with sanding dust and needs to be cleaned thoroughly.
How to Extend Sanding Disc Life
Are you looking to get the most out of your sanding discs? Well, there are a few things you can do to improve the life of your sandpaper.
- Clean your workpiece often. Keep a vacuum on hand and after every pass, just quickly go over the workpiece and get the sawdust off the wood. This will help keep the sandpaper from getting clogged as easily.
- Use the correct grit. If you try to use a finer grit, let’s say 180, to take off large amounts of material, you are wasting time and money. Before you can achieve your goal, your sandpaper is going to get clogged or worn out and need replacement. Just make the switch to a lower grit number to take off large amounts of material.
- Clean the sanding disc with a cleaning stick. A cleaning stick is used to clean out resin and sawdust created from sanding. It can give your sanding disc a new life and is handy to have around. Check out the video below to see it in action.
How Do You Change the Sanding Disc on an Orbital Sander?
Whether your sanding disc needs to be replaced or you just need to use another grit, you will need to know how to replace the sanding disc on your random orbital sander. It is a fairly straight forward process, and after you have done it once you will have no problem changing it again in the future.
- Power off the orbital sander. Make sure the power to the sander is off and that it is unplugged for added safety. You don’t want to hit the start switch while you are changing the sanding disc and risk any injury.
- Remove the used sanding disc. Grasp the edge of the sanding disc in one hand and the random orbital sander in the other. Now pull the sanding disc off carefully. The hook and loop will resist removal, which is the reason it doesn’t fly off while you are sanding, but a firm, even pull should take the sanding disc off without too much issue.
- Place the new sanding disc on sander. Now that the used sanding disc is removed, it is time to place the new one on your sander. Align the holes of your random orbital sander and your sanding disc. Begin pressing the sanding disc onto the backing pad of the sander, so that the hook and loop ‘lock’ the disc onto the sander.
- Check for correct alignment. The last thing you will need to do is to check that the sanding disc is correctly aligned on your sander. Make sure the dust collection holes are lined up. Also, check that the outer circle of your disc and the outer circle of your backing pad are aligned. If there is misalignment, it can cause swirl marks and an out-of-balance sander.
Repeat the steps above for changing out the old disc or for changing grit numbers.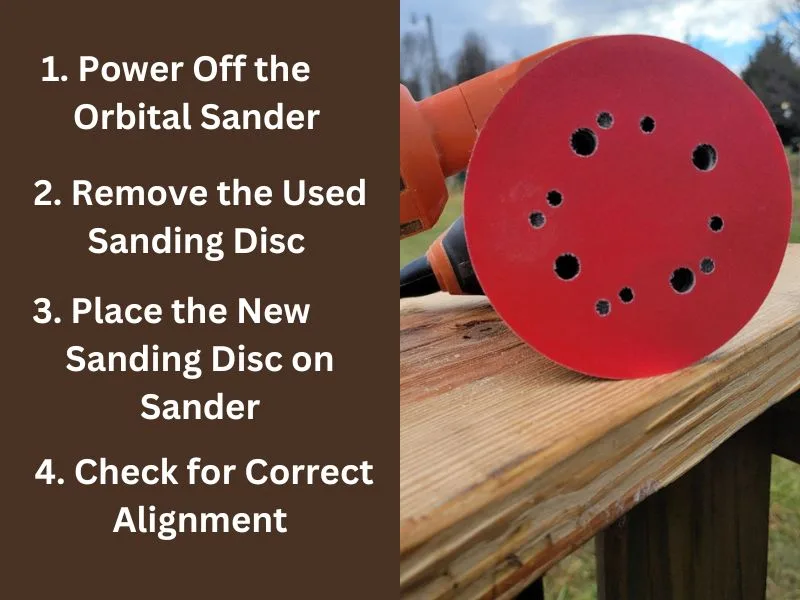
Can you Reuse Sanding Discs?
Despite your best efforts, and religious cleaning of your workpiece and the sanding disc, it has reached the end of its useful life (or so you think).
Even though a sanding disc may have reached its useful life on your random orbital sander, that does not mean that it has to just be thrown away.
A common practice is to hold onto these disc to reuse them for hand-sanding portions of your project. When you hand-sand you can apply a lot more pressure than you can with a random orbital sander. This allows for the sandpaper to be of value for those delicate or hard-to-reach areas.